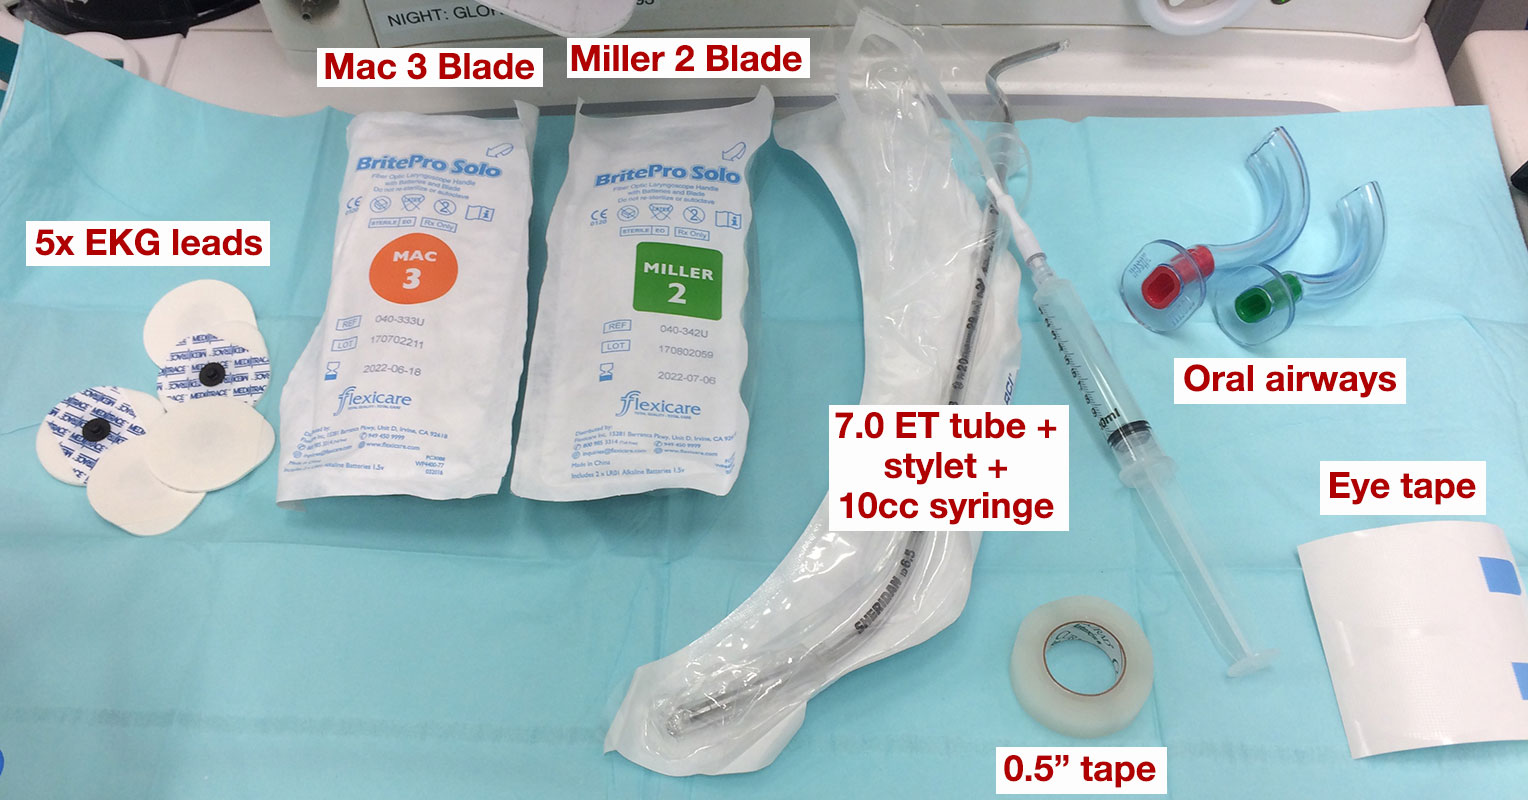
- Set up the anesthesia table as below:

- Clean throws (blue sheets) can be found in the bottom drawer of the blue cart.
- EKG Leads can usually be found be found in the 4th drawer of the blue cart.
- Miller (size 2) and Mac (size 3) blades can usually be found in the 1st drawer of the anesthesia machine. These blades are disposable. Once you know which blade your resident/attending prefers to use first, you can pre-open that one, assemble the blade and check that the light works.
- Oral airways can usually be found in the 1st drawer of the anesthesia machine.
- Stylet can be found in the 1st drawer of the anesthesia machine.
- Tube can be found in the 3rd drawer of the anesthesia machine.
- Eye tape can be found in the 3rd drawer of the blue cart.
- 10cc syringe can be found in the 4th drawer of the blue cart.
- 0.5" tape, used to secure the ET tube, is in the 2nd drawer of the blue cart.
Additionally, remember to do the following:
- Ensure that the tube is curved to resemble a hockey stick (as in the picture above).
- Ensure that the bulb on the tube inflates and deflates with a syringe. You can leave the syringe connected (as in the picture).
- You can shape the top of the stylet so it is easier to withdraw from the tube; however, ensure that the stylet does not protrude from the bottom end of the tube, which could cause laryngeal trauma.
- Attach EKG leads to the EKG cables.
- Attach suction to the suction tubing and check to ensure it works. Optionally, get a Yankauer tip (looks like a blue plastic finger) from the bottom drawer of the anesthesia cart and put it on the end.
- Check to make sure are ambu-bag is available and works (check by squeezing the bag. It should make a different sound when air goes out of it, and as air comes into it.)
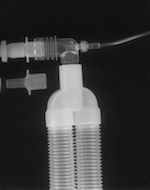
- Make sure the CO2 sensor line is connected to the right angle port at the end of the airway circuit. It looks like the little plastic line on the upper right of this picture, and is often left hanging off when the mask is replaced between cases.
